Category Archives: 1890s

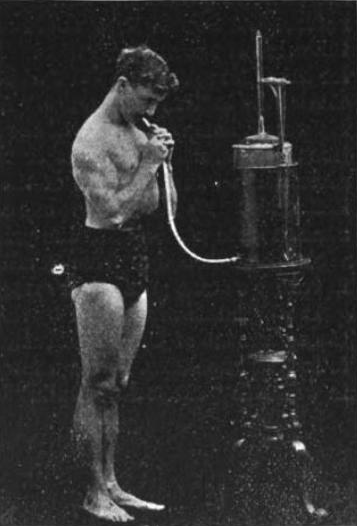
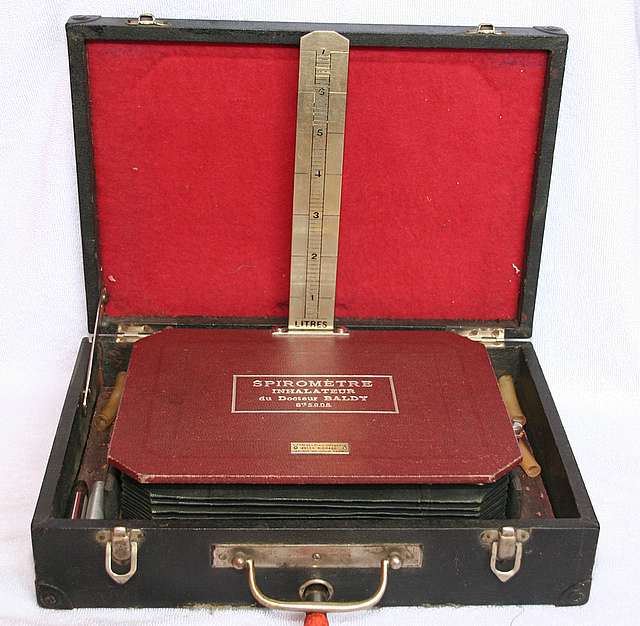
Spirometry, 1892

Spirometry_1892

From: Manual for Physical Measurements in Connection with the Association Gymnasium Records, by Luther Halsey Gulick, published by International committee of Young men’s Christian associations, 1892, page 39.

“After inflating the lungs to their utmost capacity, blow slowly into the spirometer.  Three trials may be allowed.  Record the greatest one.”

Marey Pneumograph, late 1800’s, close-up

Marey_Pneumograph_n4

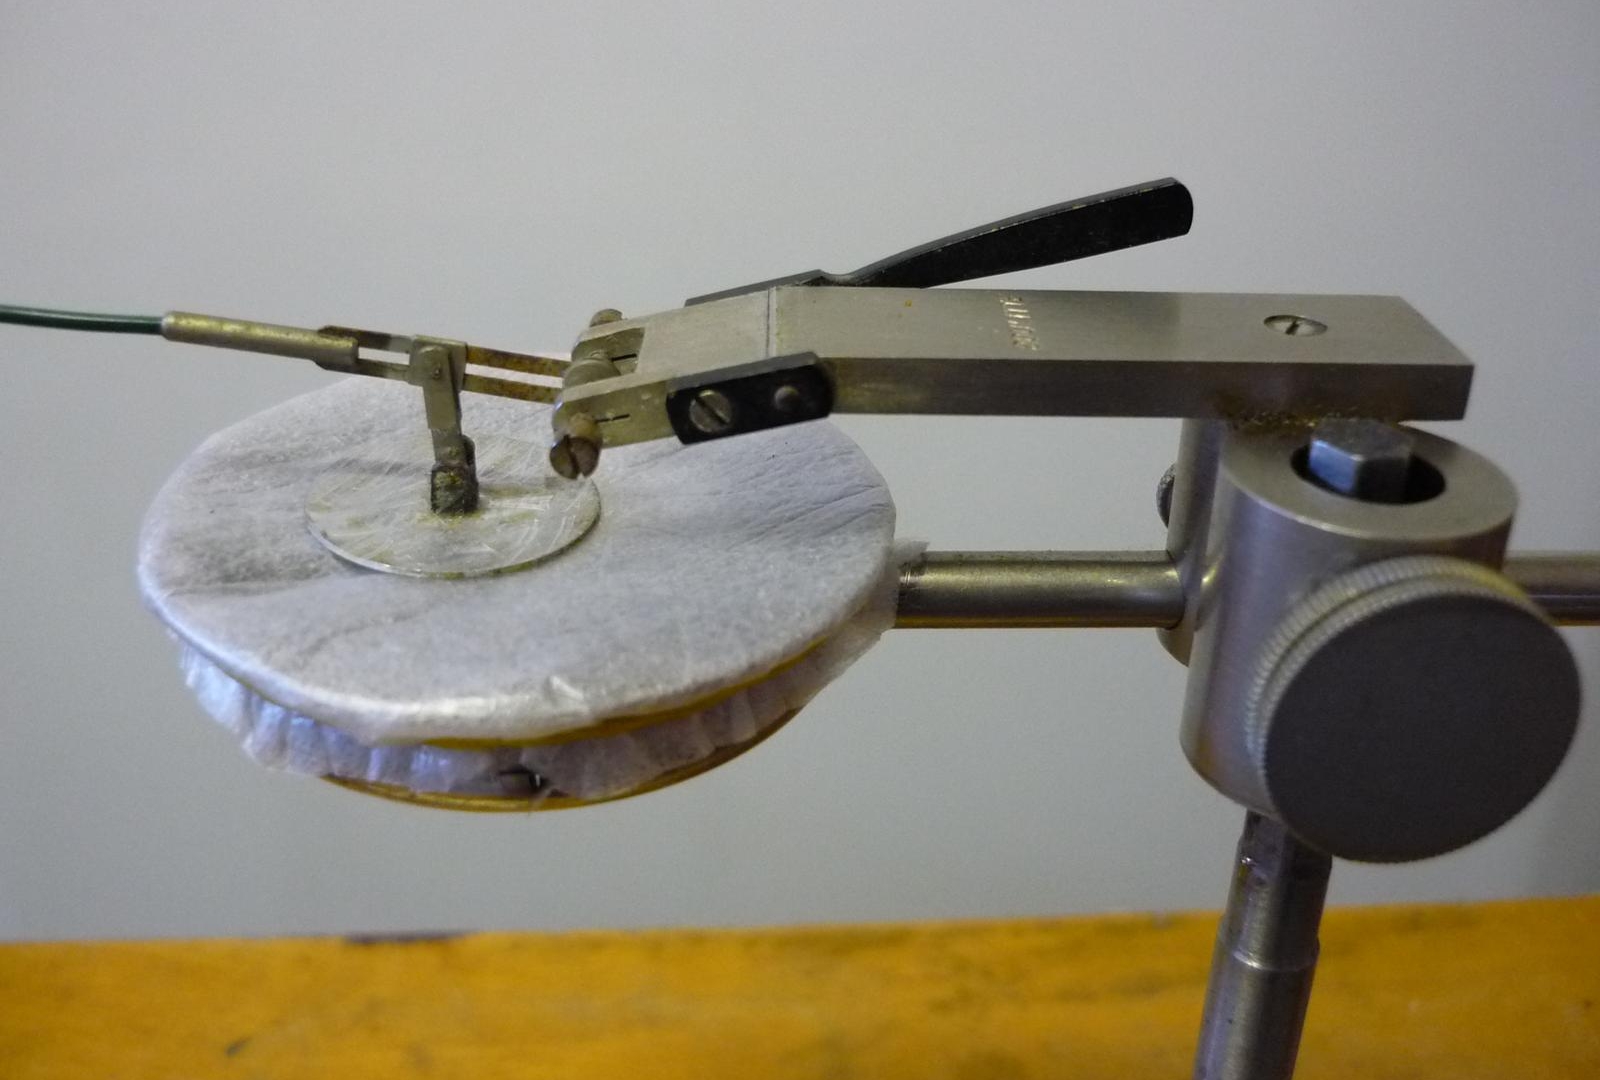
The Marey Pneumograph was a pressure-sensing device and was used to measure respiration.  Although it was sensitive it was not terribly accurate but it was the first device able to do what it did.  The descriptions of the Marey Pneumograph from the late 1800’s implied that the diaphragm was a disk of thin metal but from this photograph it seems far more likely it was thin rubber or another similar material.  Shown is a close-up of the diaphragm mechanism. This device was originally called a pneumograph but a later invention of Marey’s, which consisted of an elastic device strapped across the chest that directly measured the expansion and contraction of the thorax with breathing took that name and this is more correctly known as the Marey Tambour.  Photograph is courtesy of Pierre Moutonnet.

Marey Pneumograph, Late 1800’s

Marey_Pneumograph_n2

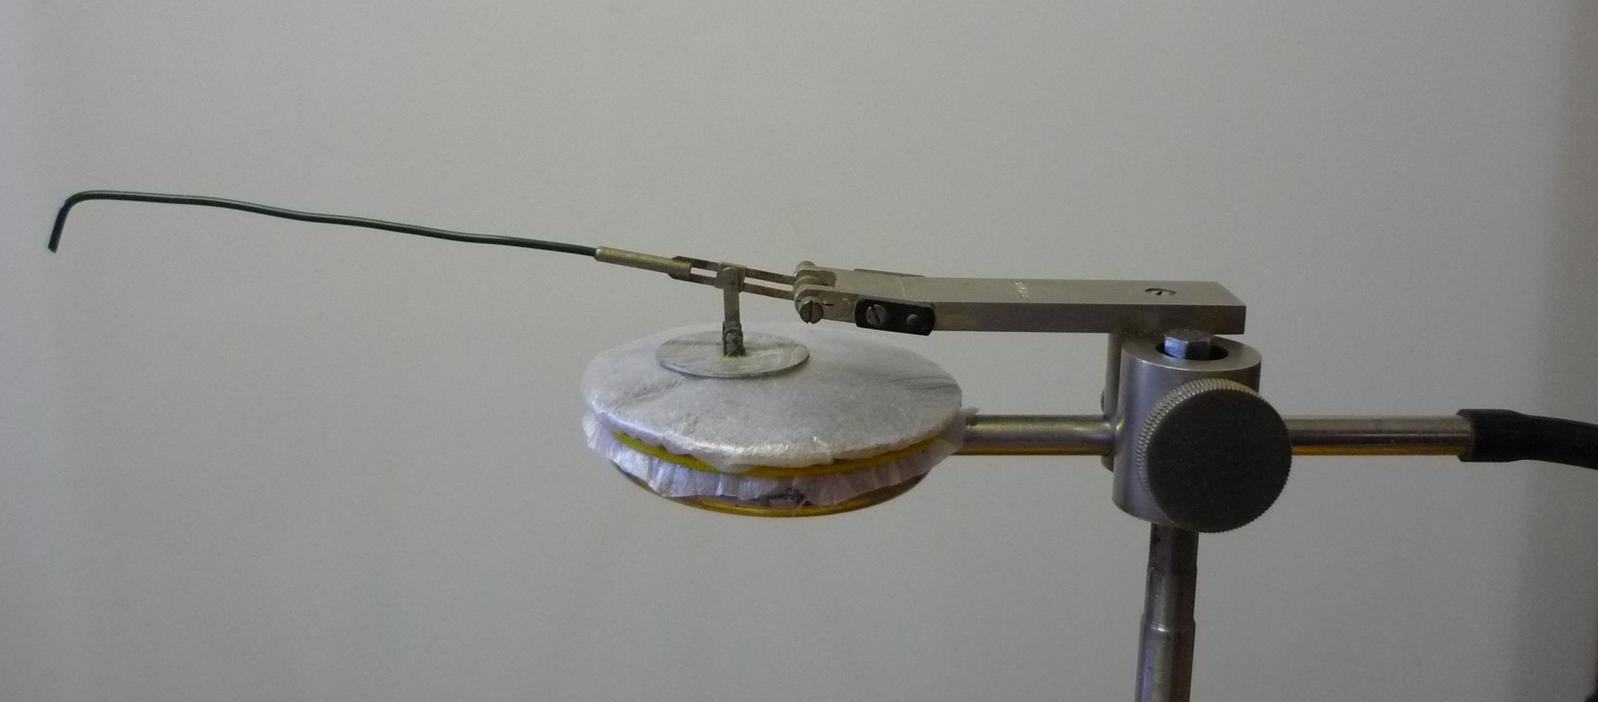
The Marey Pneumograph was a pressure-sensing device and was used to measure respiration.  Although it was sensitive it was not terribly accurate but it was the first device able to do what it did.  The descriptions of the Marey Pneumograph from the late 1800’s implied that the diaphragm was a disk of thin metal but from this photograph it seems far more likely it was thin rubber or another similar material.  The stylus attached to the diaphragm traced a graph of its movement onto a smoked (carbon black) metal drum and is shown here with the diaphragm pressurized. This device was originally called a pneumograph but a later invention of Marey’s, which consisted of an elastic device strapped across the chest that directly measured the expansion and contraction of the thorax with breathing, took that name and this is more correctly known as the Marey Tambour.  Photograph is courtesy of Pierre Moutonnet.

Marey Pneumograph, late 1800’s

Marey_Pneumograph_n1

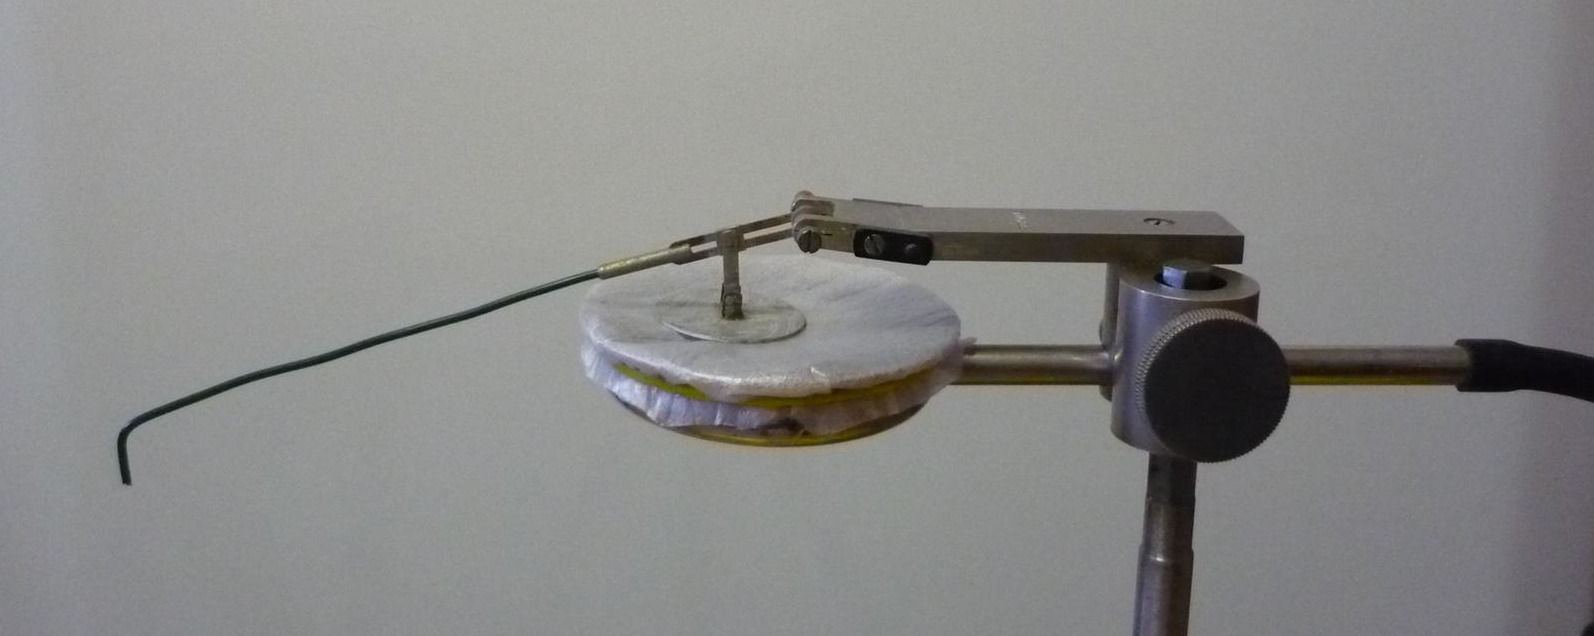
The Marey Pneumograph was a pressure-sensing device and was used to measure respiration.  Although it was sensitive it was not terribly accurate but it was the first device able to do what it did.  The descriptions of the Marey Pneumograph from the late 1800’s implied that the diaphragm was a disk of thin metal but from this photograph it seems far more likely it was thin rubber or another similar material.  The stylus attached to the diaphragm traced a graph of its movement onto a smoked (carbon black) metal drum and is shown with a relaxed diaphragm. This device was originally called a pneumograph but a later invention of Marey’s, which consisted of an elastic device strapped across the chest that directly measured the expansion and contraction of the thorax with breathing took that name, and this is more correctly known as the Marey Tambour.  Photograph is courtesy of Pierre Moutonnet.

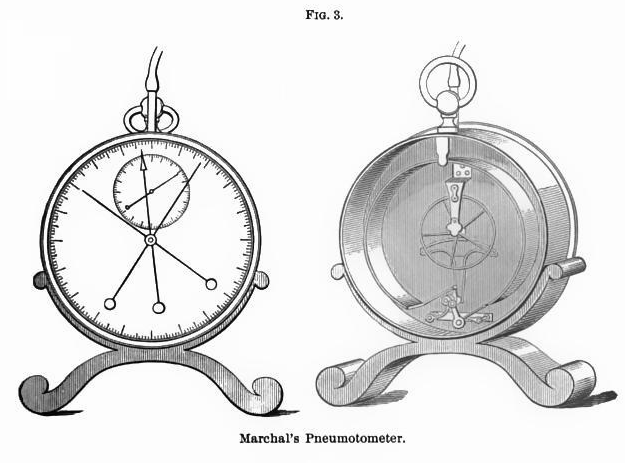
Marchal’s Pneumatometer, 1895

Marchals_Pneumatometer_1895

From Physical and Natural Therapeutics by Georges Hayem, 1895, page 21.

“Marchal’s Pneumatometer consists essentially of a manometric tube, representing almost a complete circle, and communicating at its upper portion with a mouthpiece, from or into which inspiration or expiration is made according as the force of one or the other is to be measured. Index needles serve to mark the diminuation and the increase in pressure (fig 3.).

“If the inspiratory force is to be determined, the needle is placed on the side marked inspiration, and with it also one of the maximal needles. Then, having made a strong expiration, the person applies the lips hermetically against the mouthpiece and takes the deepest inspiration possible. The index needle is displaced, carrying the maximal needle with it; the latter remains at the extreme point, but the former quickly rebounds. The number of degrees indicated by the maximal needle corresponds to the pressure in centimeters of mercury.

“To measure expiration, the stopcocks are reversed, and the needle, carrying the maximal needle with it is placed on the corresponding side. The subject after taking the strongest possible inspiration expires forcibly, and the second maximal needle indicates the result of the effort.

“As a rule the inspiratory effort is less powerful and the expiratory; according to Marchal the ratio is 2 to 3.

“Moreover the result of the effort is not necessarily proportionate to the vital capacity, for the muscles of respiration vigorous in one possessing a relatively small vital capacity, and vice versa.”

Spirometer, Hutchinson, 1894

Spirometer_Hutchinson_1894

From: A Text-book of Pathology: Systematic & Practical, Volume 2, Part 1, by David James Hamilton, 1894, page 50.

“Means of measuring the Vital Capacity – Hutchinson Spirometer.

“This instrument consists of a vessel containing water, out of which a receiver is raised by breathing into a tube; the height to which the receiver is raised indicates the volume of the vital capacity.

“To prepare the instrument for use.

“(1) Place the instrument about three feet from the ground on a firm, level table.

“(2) Turn off the water tap (fig. 235, 4) and open the drain tap (5) seen at the bottom of the spirometer.

“(3) Pour water into the spout at the back until it rises behind the slip of glass (3) placed above the air tube.

“(4) Slide the movable index (2) opposite zero on the scale and add water until it is exactly level with the straight edge of this index. Should too much water already be poured into the spirometer, draw off by the tap (4) sufficient to bring the water down to the edge of the index.

“(5) Pour a little colored spirit into the bent tube (6) until it rises in the two legs of this tube about 3-1/2 inches (7).

“(6) Fix the rods (8) into the sockets (9) on each side at the top of the spirometer.

“(7) Place the cross-head (10) upon these rods, so that the name of the instrument faces the operator; then pass the two red cords (11, 11) over the pulleys at each end of the cross-head.

“(8) Turn off the taps (5 and 1), then suspend the counterbalance weights (12, 12) to the red cord.

“(9) Screw the flexible tube (14) on to the extremity of the air-tube above the tap (1).

“(10) The small thermometer (13) may either be attached to the spirometer on the little hook above 13, or, which is better, hung up in any convenient corner of the room.

“The spirometer is now ready for making an observation”